Step 1
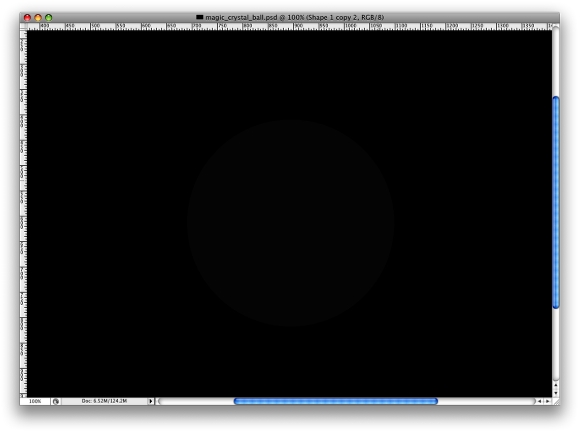
Create a new document, I used 1900px by 1200px. Fill the background layer with black. Then with the Ellipse Tool (U) create a circle. You can fill it with a dark gray, but the color won't matter because we will apply a Layer Style to this object shortly.
Step 2
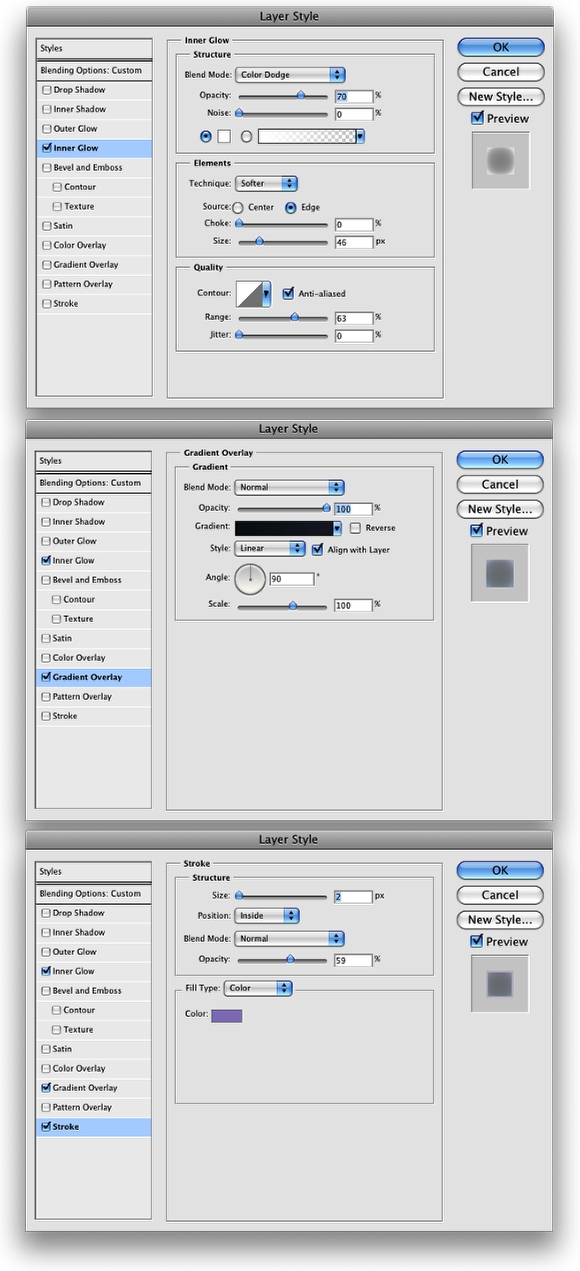
To add the Layer Style, go to Layer > Layer Style. First, select Inner Glow and use: white for the color, Color Dodge for the Blend Mode, and 70% for the opacity.
The second Layer Style will be Gradient Overlay, use Linear for the Style, and keep Normal for the Blend Mode. Now the colors will be #12232c and #313444. The last Layer Style will be Stroke, which should be set: 2px for the Size, 60% for the Opacity, and for the color use #a395cf. Feel free to change the colors and test new variations.
Step 3
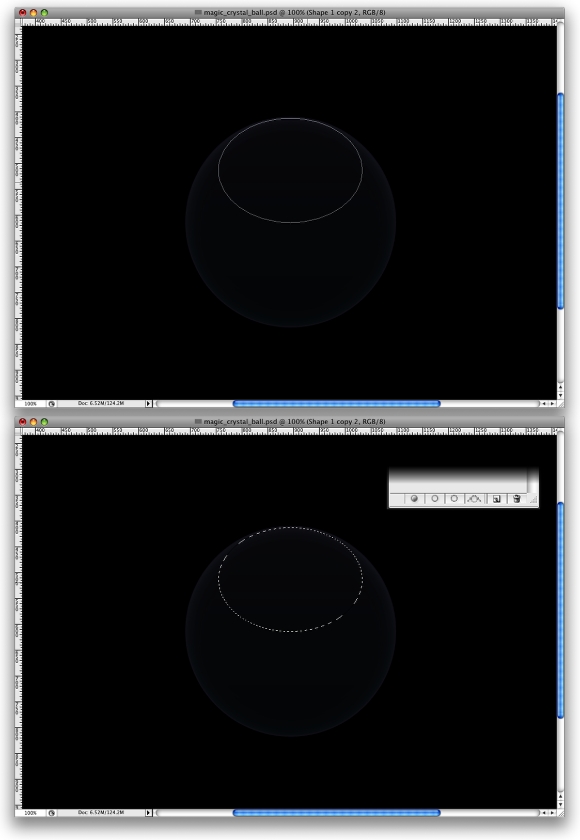
Create another circle using the Ellipse Tool (U). The best thing is to create a Path with the ellipse tool. Adjust the shape the way you want. Then create a selection from the Path Palette. This circle will be the top reflection on the ball.
Step 4
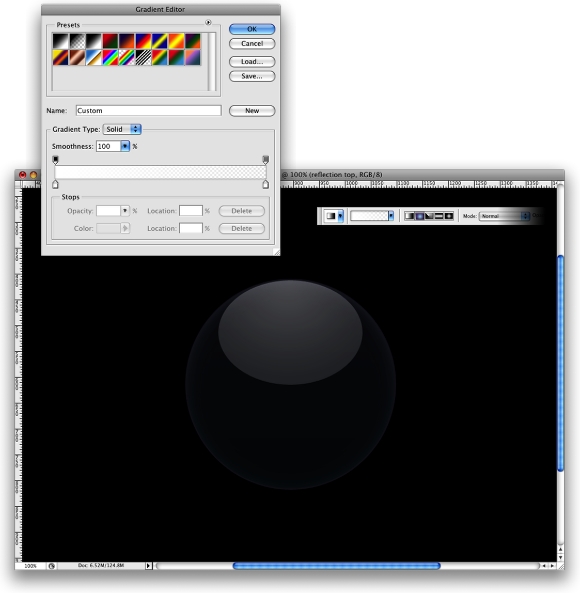
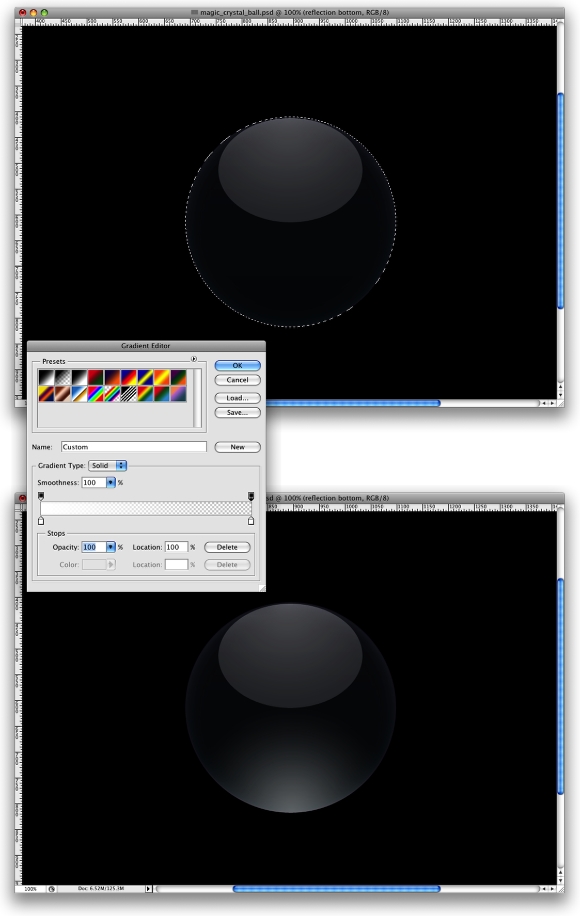
Create a new layer and rename it to "reflection top." Then select the Gradient Tool (G). Use white for the color on both ends. Change the opacity though, one will be 100%, while the other will be 50%. Select Radial for the Style. Then create a radial gradient, as in the image below. For the Opacity use 70%Tip: Make sure that the 100% is the center of the gradient.
Step 5
Lets create a reflection at the bottom of the sphere. To do that, create a selection from the circle layer, which is the first one we already created. Create a new layer, and rename it to "Bottom reflection."
Select the Gradient Tool (G), and use the same settings as in the previous step. This time lets set the Opacity to 100% and 0%. Now create the gradient. Also, change the Layer's Opacity to 50%. Use the image below for reference. Tip: You can resize this layer to make it slightly smaller so you can move it 1 pixel up.
Step 6
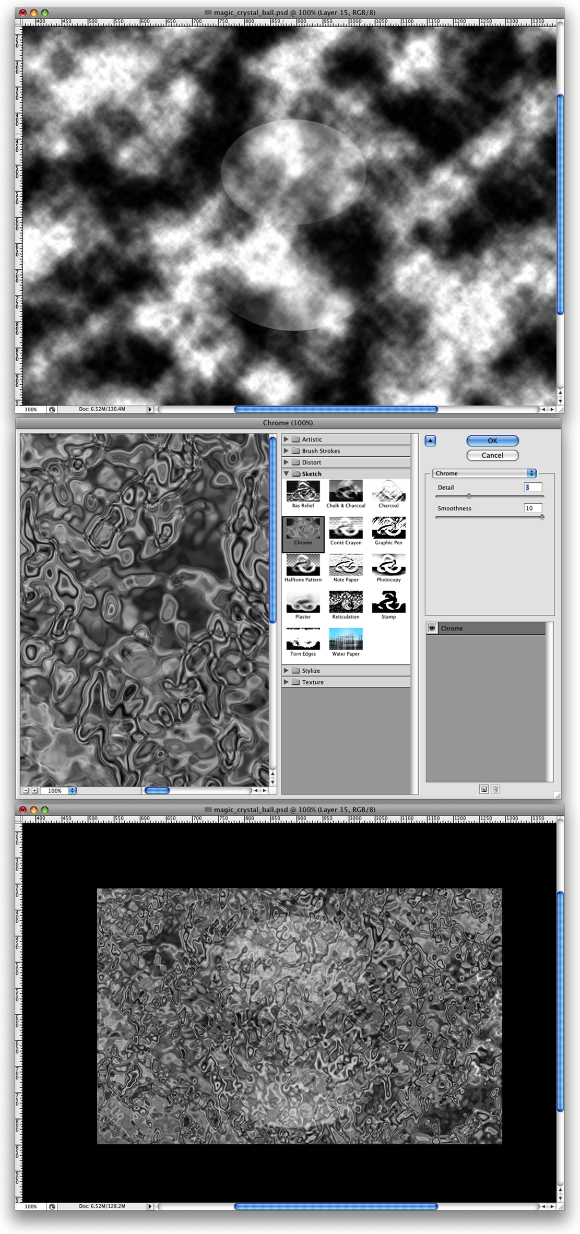
Create a new layer, and rename it to "lights 1." Make sure you have black and white for the background and foreground colors. Then go to Filter > Render > Clouds. After, go to Filter > Sketch > Chrome. Use 3 for the Detail and 10 for the smoothness. Then rescale the layer, make it much smaller so the details will be smaller too.
Step 7
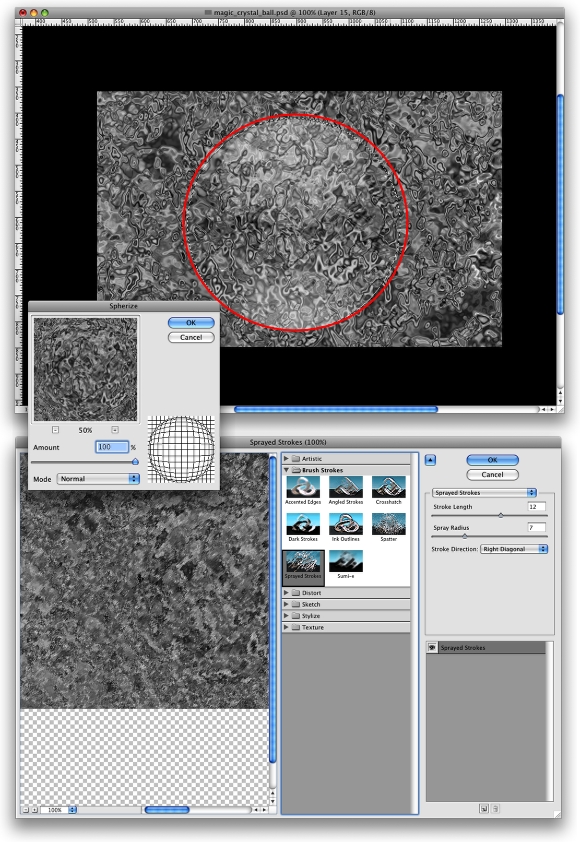
Create a marquee selection from the "ball layer," and go to Filter > Distort > Spherize. Use 100% for the Amount and Normal for the Mode. Then go to Filter > Brush Strokes > Sprayed Strokes. Use a Stroke length of 17 and Spray Radius of 7.
Step 8
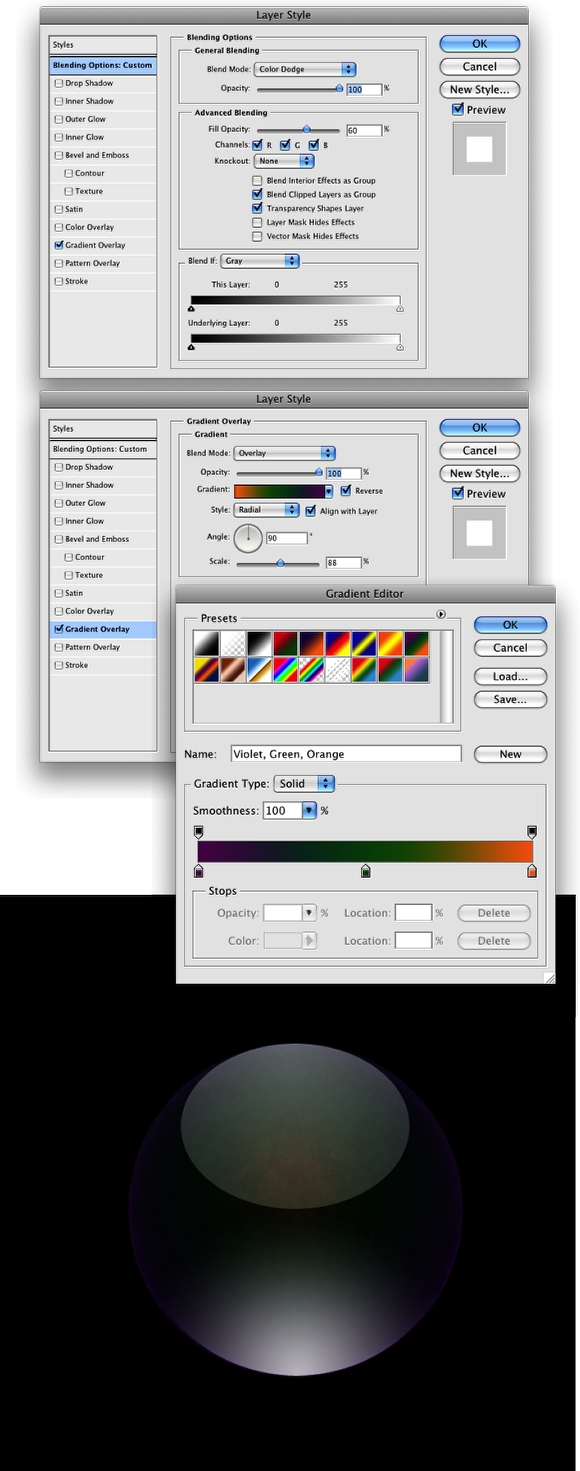
Now lets add some color to the crystal ball. With the "lights 1" layer selected, go to Layer > Layer Style. Then change the Fill Opacity to 60%. After, select the Gradient Overlay, use the Violet, Green, and Orange preset for the colors. For the Gradient Style use Radial. Align the radial to the ball, so the orange will be the center of the gradient, and then go to the Violet.
Step 9
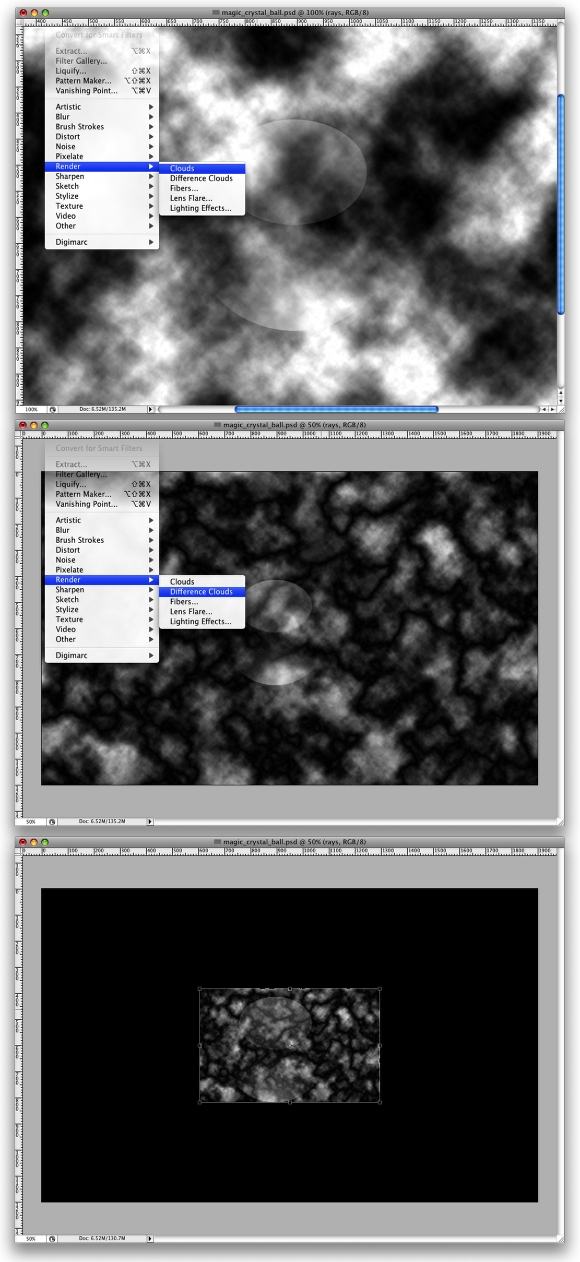
To create the lighting effects inside the ball we will use the Difference Clouds Filter. So create a new layer, and rename it to "rays." Then go to Filter > Render > Clouds. Then go to Filter > Render > Difference Clouds.
Next we rescale the layer to the same height as the ball. You may notice that with the difference clouds filter we have created the lightning, but they are black. Also, you can define the thickness of the lightning when you scale the layer.
Step 10
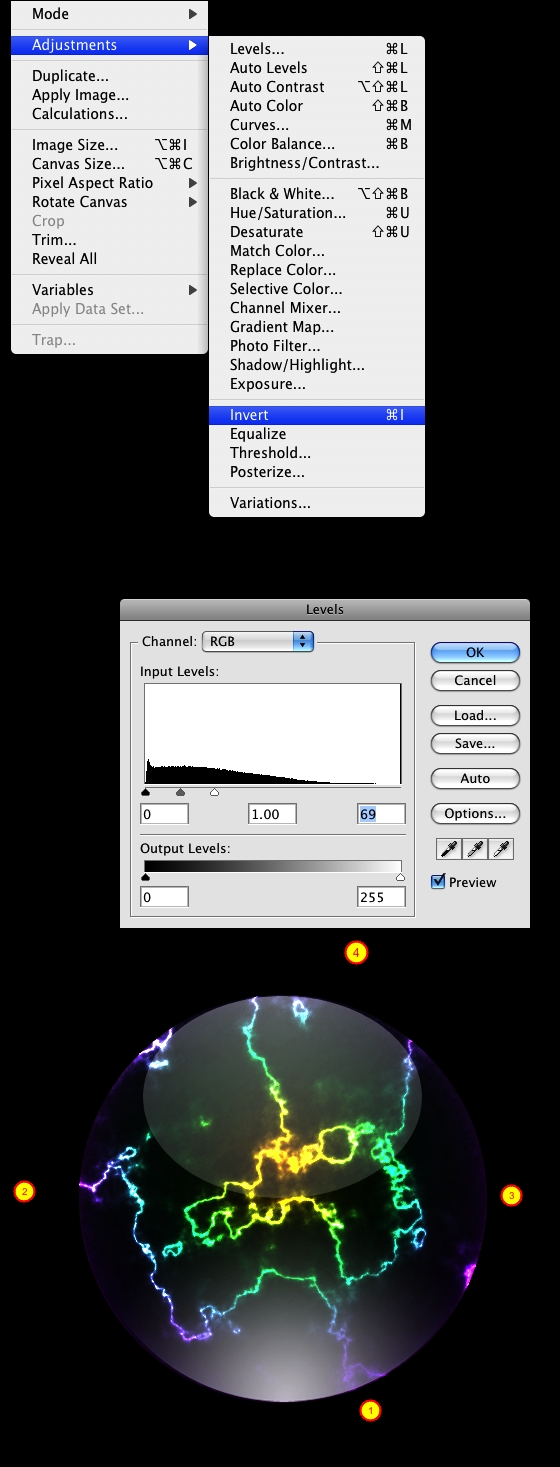
To change the color of the lightning from black to white is simple, go to Image > Adjustments > Invert. However, to get the effect right you will have to change the levels as well. So go to Image > Adjustments > Levels. Use for the Input Levels 0, 1.00, and 70. Then change the Blend Mode to Color Dodge.
There are 2 more things to do here. First, we create a Layer Mask, so the lights will be only inside the ball. Then with the Eraser Tool (E), select a medium brush, a regular one, but with a hardness of 0% and 10% opacity. Then erase some parts of edges 1-4. Also, you can change the opacity of "Reflection Top" and "Reflection Bottom," so they will be more visible.
Step 11
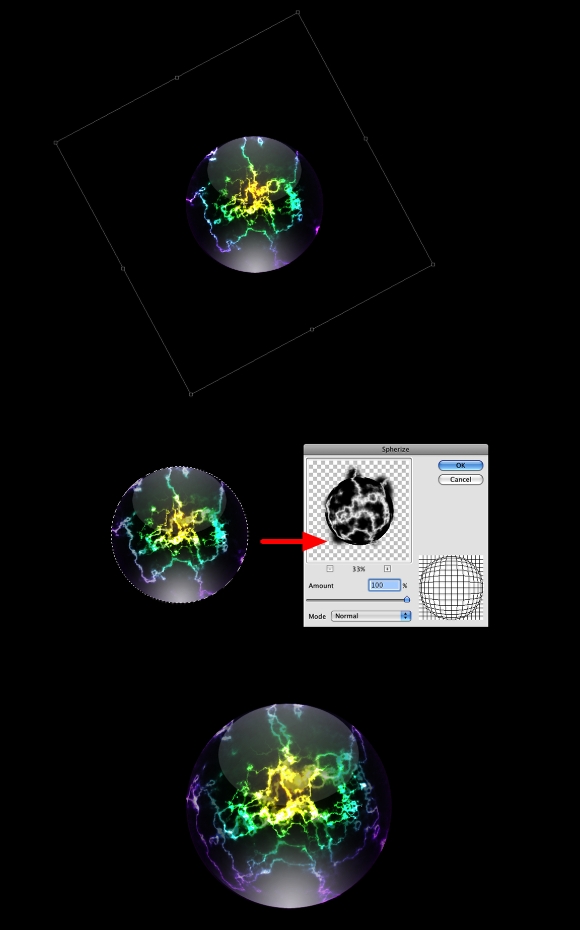
To create more Rays, you can either duplicate the layer or repeat steps Steps 9 and 10. I duplicated it, but the best thing to do is to repeat the previous steps. Also, you can apply the Spherize Filter. Tip: Change the Opacity of the layers to give more depth to the effect.
Step 12
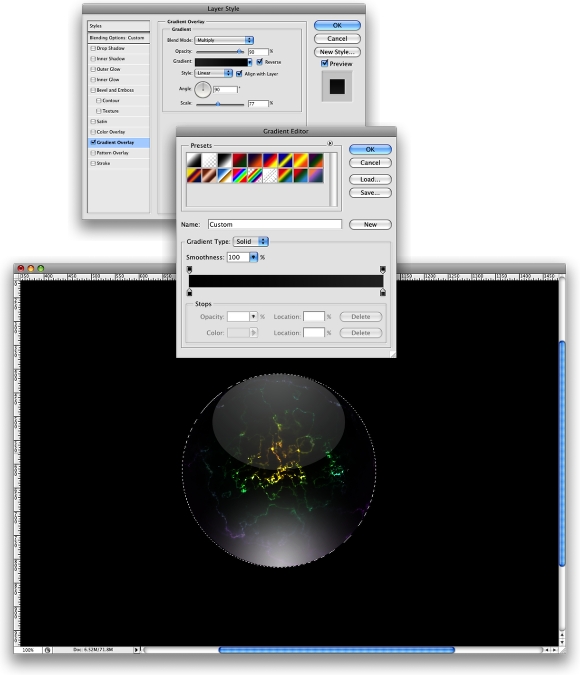
Here, we will create a layer to adjust the colors. We need to make the ball a bit darker. So just add a new layer, and create a marquee selection of the original ball. After, fill it with Black.
Add a Layer Style. Change the Fill Opacity to 0% and select Gradient Overlay. Use Multiply for the Blend Mode, 90% Opacity, and set it to Linear. For the colors use Black and a dark gray. Tip: This layer will be beneath the other light layers.
Step 13
Lets create a nice texture in the ball. Create a new layer on top of the others, but beneath the "Reflection Bottom and Top layers." Rename it to "texture."
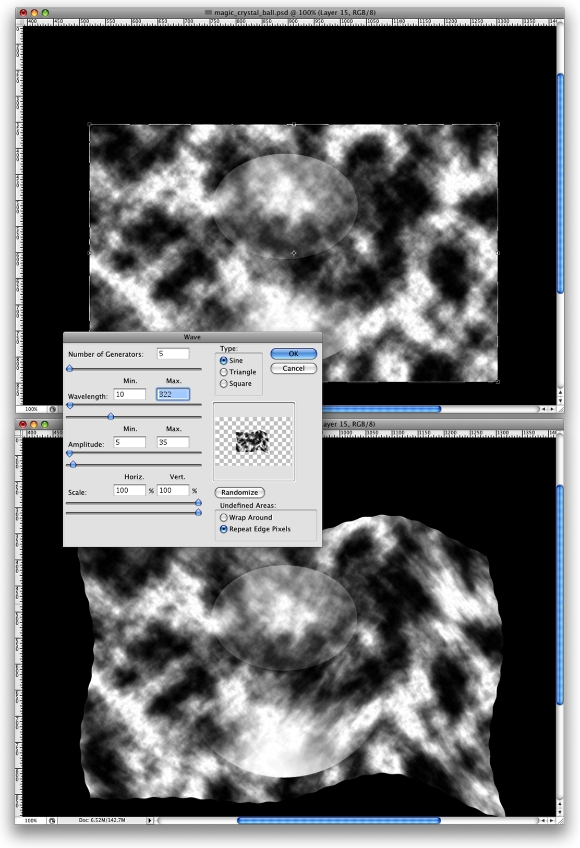
Now go Filter > Render > Clouds. Then resize the layer, and make it a bit bigger than the ball. Finally, go to Filter > Distort >Wave. For the Number of Generators use 5, the Wavelength use Min. 10 Max 320, Amplitude Min 5 Max 35, and the rest keep the same.
Step 14
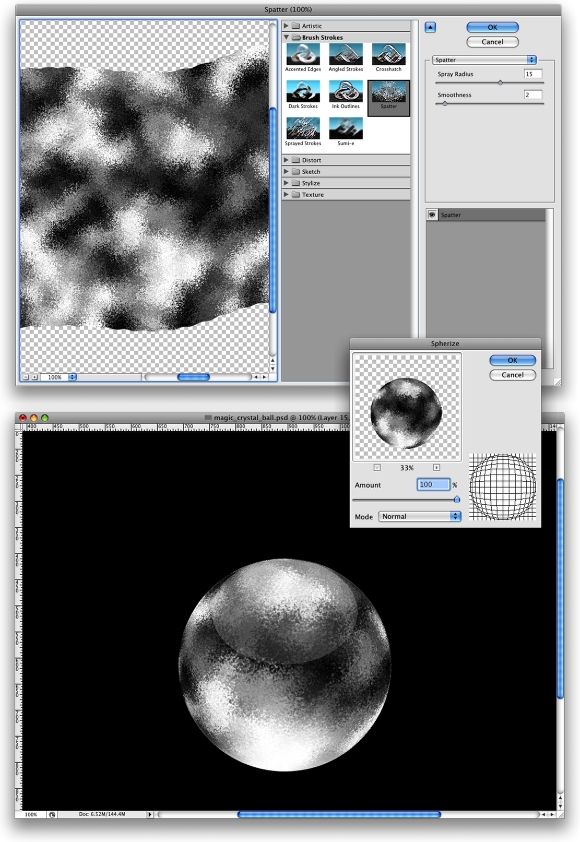
Go to Filter > Brush Strokes > Spatter. Use a Spray Radius 15 and Smoothness 2. Next we create a marquee selection from the "ball" layer, and go to Filter > Distort > Spherize again. Use 100% for the amount.
Step 15
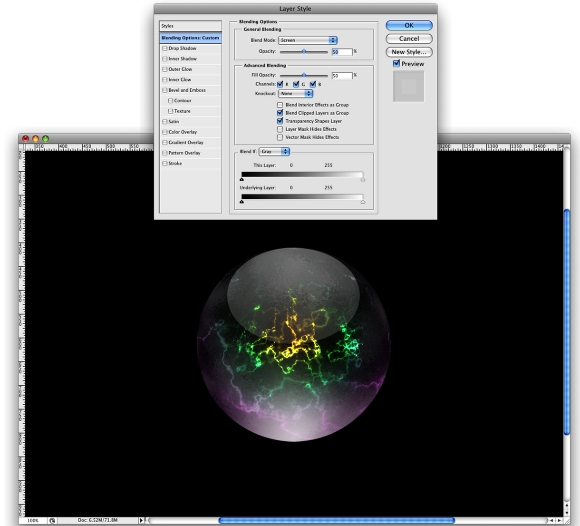
Let's adjust the layer next. Change the Blend Mode to Screen, the opacity to 50%, and the fill opacity to 50% as well. If you don't want to show the texture that much, just reduce the opacity.
Step 16
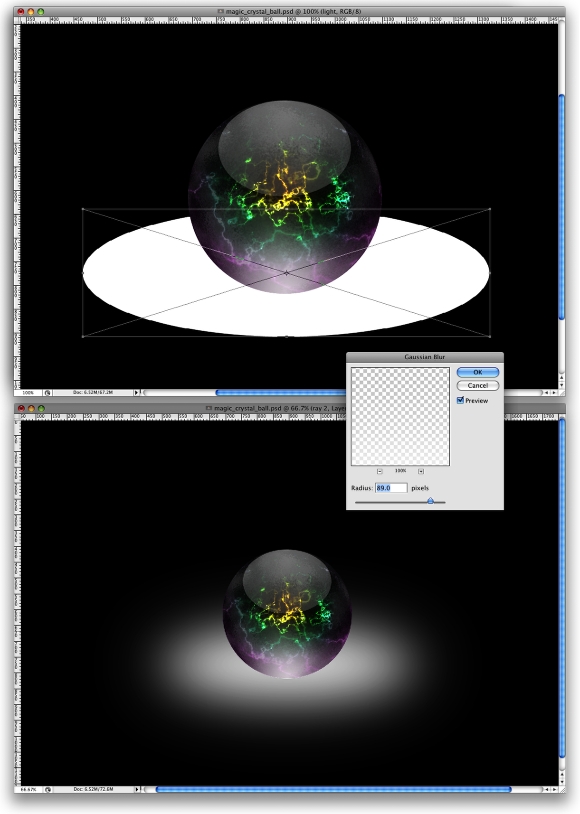
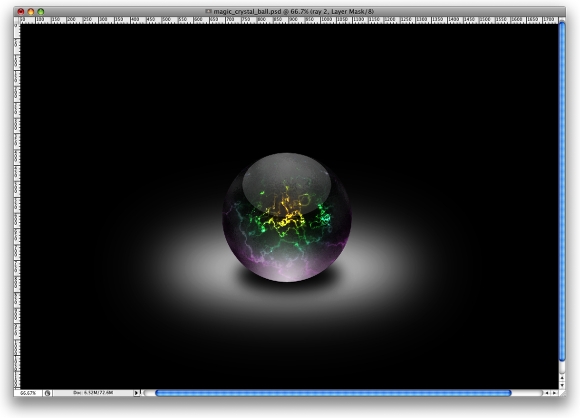
Select the Ellipse Tool (U). Then click on Shape Layers. This will create a layer in the shape of the foreground color. Now create an ellipse, as in the image below. After, go to Filter > Blur > Gaussian Blur. Then use 90 pixels for the Radius. This layer will be the spot of light for the ball.
Tip: This layer has to be beneath all the other layers, even the "ball" layer.
Step 17
Now lets create another ellipse, as we did in the previous step. This time let's use black. Also, instead of creating a light spot, let's create a shadow.
Step 18
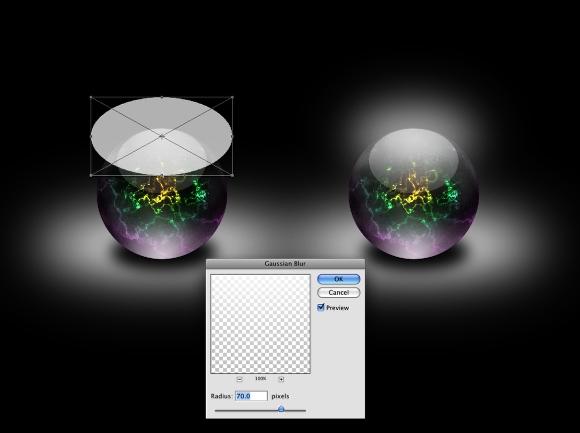
Next we add a glow light at the top of the ball. Again, repeat step 16, but for the Gaussian Blur use Radius of 70 pixels. Notice that this layer will be on top of the others.
Step 19
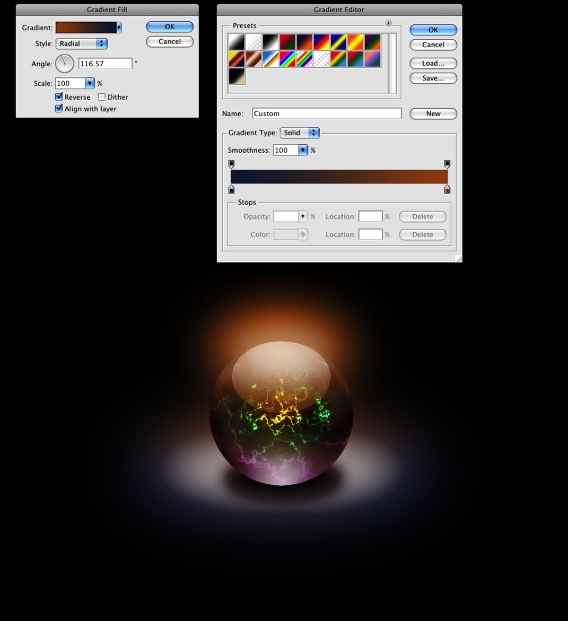
Let's adjust the colors. Create a Gradient Fill layer. To do that, go to Layer > New Fill Layer > Gradient. For the colors use #223158 and #b8641c. For the style use Radial, and set the angle 115º. After, change the Blend Mode to Overlay.
Tip: You can position the gradient by clicking and holding the mouse button. Also, move the mouse while the Gradient Fill dialog box window is open.
Step 20
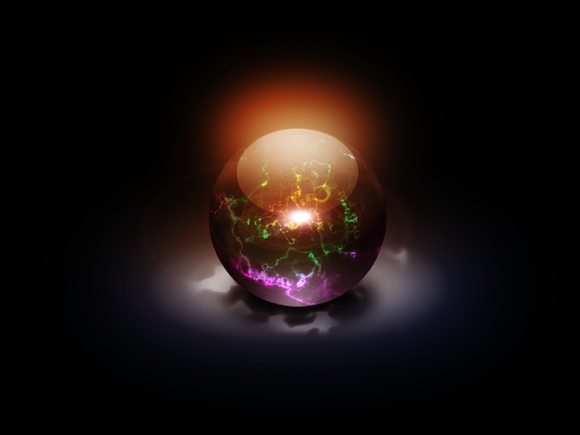
Create a new layer on top of the others. Then fill it with black, and go to Filter > Render > Lens Flare. Use 60% Brightness and 50-300mm Zoom.
Adjust the levels of this layer. Go to Image > Adjustments > Levels. Then change the Input Levels to 7, 1, and 210. Now change the Blend Mode to Screen, and rescale the layer, use the image below as a reference.
Conclusion
In this tutorial, we learned a light effect that is created by using the clouds and difference clouds filter. You can add more layers to create different effects inside the ball, or duplicate some layers to create more reflections, like the Caustic effect I created on the final image.
You could use the Spherize filter. Also, you can change the Gradient Overlay colors in one layer only, and change the other colors separately, thereby creating a totally new effect. It's all about playing now; Have fun!


0 Comments:
Post a Comment