Globe Earth

Step 1

This is picture of earth made in vectors. You can find allready draw in vectors on internet,

or you can draw by yourself in corel or illustrator and then export to photoshop. It's your choise.

When you decide how you gona get this picture, make sure that picture is draw in two layers.

Globe Earth image 1

Step 2

We now start with first (yellow) layer.

Globe Earth image 2

Step 3

Go to Layers style and give Gradient. Chose some gray-light blue color and from the same palete for second color chose more lighter almost white.

Globe Earth image 3

Step 4

Then open new layer and draw shape like this. Color him in black.

Globe Earth image 4

Step 5

To cut unneceassary parts, give selection to first layer (previos yellow).

To do that, hold ctrl and click on first layer in layer window.

Then use Inverse selection. Shift+Ctrl+I

Now go back to second layer and press delete.

Globe Earth image 5

Step 6

Go to Filter>Blur and give Gaussian blur effect.

Then in Layers window put opacity to 40%.

Globe Earth image 6

Step 7

Now open new layer. Draw rounded shape and color in white.

Globe Earth image 7

Step 8

Use again Gaussian blur effect.

Globe Earth image 8

Step 9

OK. This is how it look's.

Globe Earth image 9

Step 10

Now select second layer from start (red) and in layer style give Gradient with some dark blue color.

Globe Earth image 10

Step 11

Then open new layer and draw shape like in picture. use Transformation tool to give this position.

Globe Earth image 11

Step 12

Use Gradient tool like in picture.

Globe Earth image 12

Step 13

Repeat Gaussian blur effect.

Globe Earth image 13

Step 14

Put smaller opacity. About 30-40%

Ok. now we gona make some shadows.

Put all layer together in one Set.

Duplicate that set and merge him.

Go to Layer>Merge layer set. color him in layer option in black and use gaussian blur effect.

Globe Earth image 14

Step 15

Repeat same step with dow shadow. Use distort transformation and make position like in picute.

Globe Earth image 15

Step 16

In the end give some gradient fill to background.

Globe Earth Tutorial: Final Result

Friday, March 13, 2009

Transform a Daylight Photo into a Realistic Lightning Storm Scene

Step 1

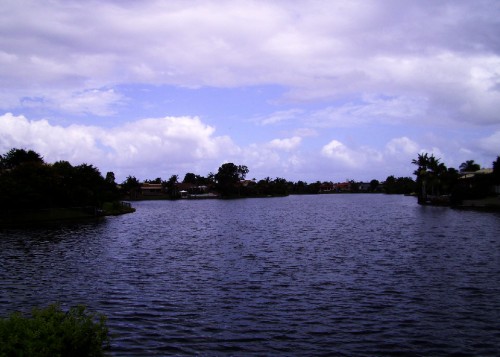
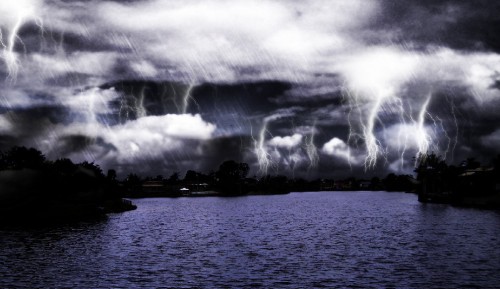
Download a copy of this image and load it into Photoshop.

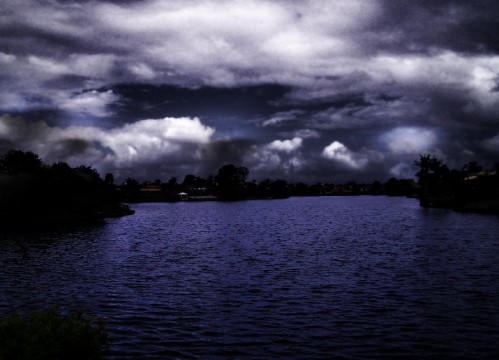
Because we're creating a rainy image, so firstly we can make the image a bit darker.

To do this, duplicate the background layer once and change it the blending option of the duplicated layer to "Multiply". This will darken the whole image and the effect is shown blew:

Transform a Daylight Photo into a Realistic Lightning Storm Scene image 1

Step 2

Then we can tackle the sky area and make it darker. Hide the "Background copy" layer for now and Press "L" to select the Lasso Tool. Draw a selection around the sky area.

Transform a Daylight Photo into a Realistic Lightning Storm Scene image 2

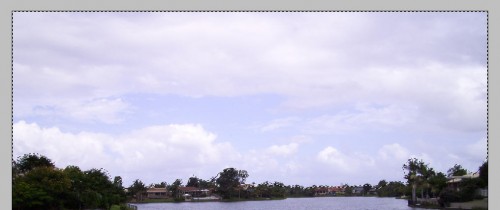
Hit Ctrl + J to make a layer via Copy, name the new layer as "sky" and drag it on top of all other layers.

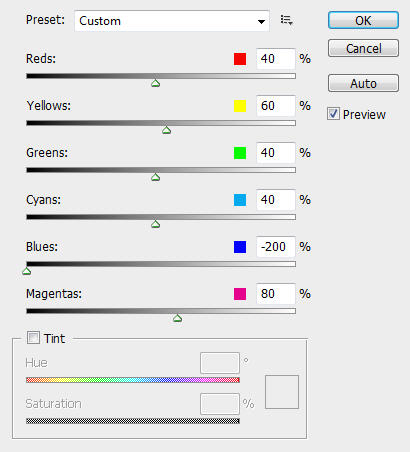
Then hit Ctrl + Alt + Shift + B and bring up the Black and White image adjustment Tool, apply the following settings:

Transform a Daylight Photo into a Realistic Lightning Storm Scene image 3

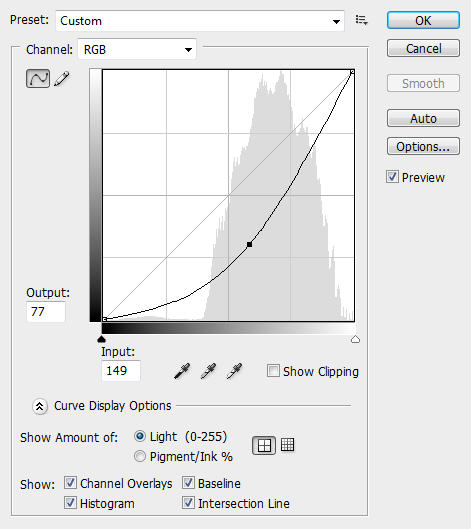
Then hit Ctrl + M to bring up the Curve Adjustment Tool, apply the following settings:

Transform a Daylight Photo into a Realistic Lightning Storm Scene image 4

You can also use the Blur/Smudge Tool to patch up the "sky" layer so it blending more seamlessly to the houses and trees below:

Transform a Daylight Photo into a Realistic Lightning Storm Scene image 5

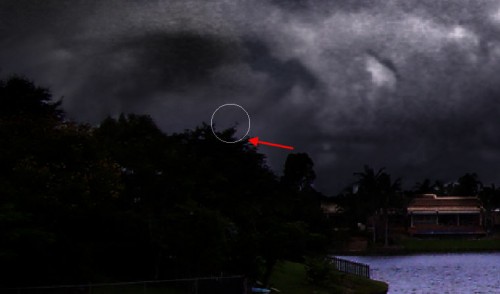
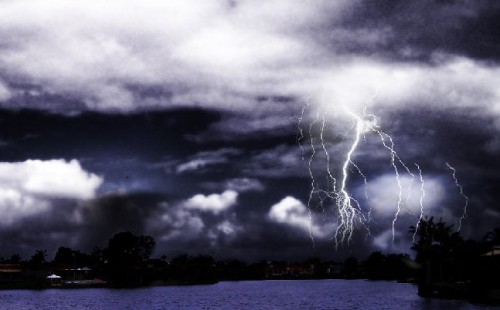
Once you're happy with the result, change the blending option of this "sky" layer to "Multiply", and the effect will look like this:

Transform a Daylight Photo into a Realistic Lightning Storm Scene image 6

Step 3

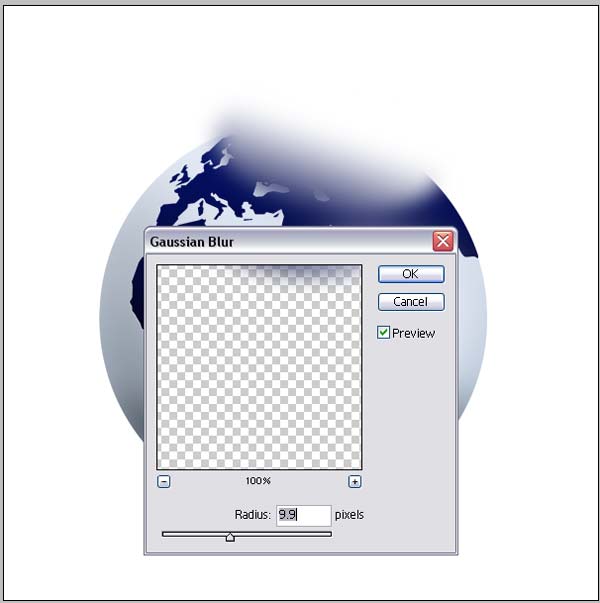
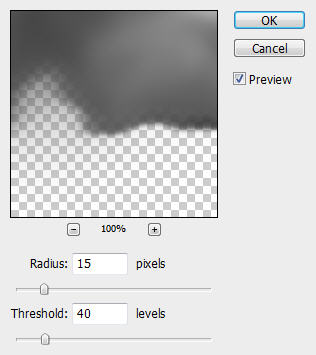
Now you will notice that we have quite a few noise on the "Sky" layer, which you may want to get rid of. So to do this, duplicate the "Sky" layer once. On the duplicated layer, go to Filter > Blur > Surface Blur and apply the following settings:

Transform a Daylight Photo into a Realistic Lightning Storm Scene image 7

Then change the layer blending of the duplicated layer to "Hard Light" and you will have the following effect:

Transform a Daylight Photo into a Realistic Lightning Storm Scene image 8

Step 4

Now we will add some lightning effect to image. Download a copy of this lightning image and load it into Photoshop. Use the Rectangular Marquee Tool to select a portion, copy and paste the selection back to our document. Put this layer on top of all other layers and name it "Lightning"

Transform a Daylight Photo into a Realistic Lightning Storm Scene image 9

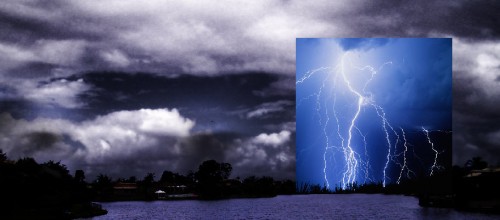
Then use the Eraser Tool to gently erase the unnecessary portion of the image and leave only the lightning bits:

Transform a Daylight Photo into a Realistic Lightning Storm Scene image 10

Step 5

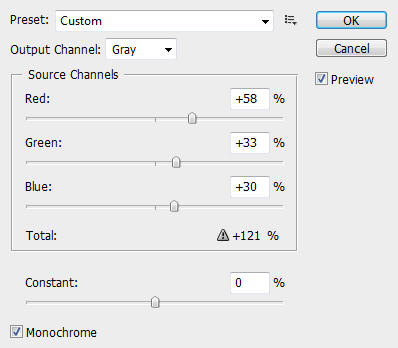
Still on the "lightning" layer, go to Image > Adjustment > Channel Mixer and apply te following settings:

Transform a Daylight Photo into a Realistic Lightning Storm Scene image 11

Then apply the following Curves Adjustments:

Transform a Daylight Photo into a Realistic Lightning Storm Scene image 12

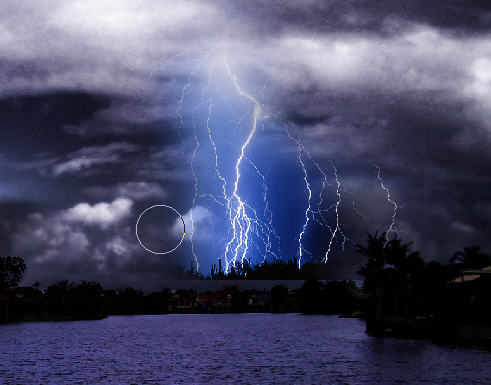
Then change the layer blending option of this lightning layer to "Screen" and you shoud have the following effect:

Transform a Daylight Photo into a Realistic Lightning Storm Scene image 13

Step 6

Still on the "lightning" layer, use the Clone Stamp Tool (S) to clone a few portion from the existing lighning and create some dynamic lightning effect:

Tip: use a big soft brush and adjust the flow and opacity to make lightning more dynamic.

Transform a Daylight Photo into a Realistic Lightning Storm Scene image 14

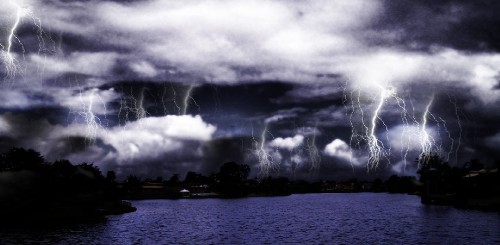
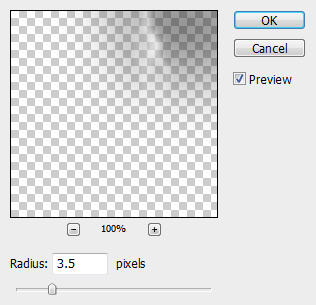
Once you're happy with the result, duplicate this lightning layer once and on the duplicated layer, apply the Gaussian Blur with the following settings:

Transform a Daylight Photo into a Realistic Lightning Storm Scene image 15

Keep the layer blending option of the duplicated layer to "Screen" and you should have the following effect:

Transform a Daylight Photo into a Realistic Lightning Storm Scene image 16

Step 7

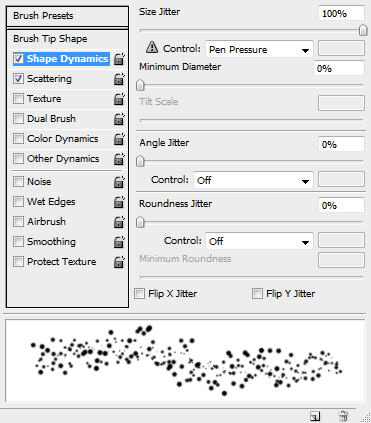
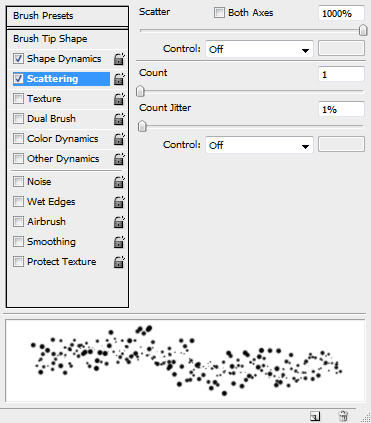
Now we can render some rainy effect on the image. Create a new layer called "Rain" on top of all other layers, grab a small White brush (3px) and apply the following brush options:

Shape Dynamics

Transform a Daylight Photo into a Realistic Lightning Storm Scene image 17

Scattering

Transform a Daylight Photo into a Realistic Lightning Storm Scene image 18

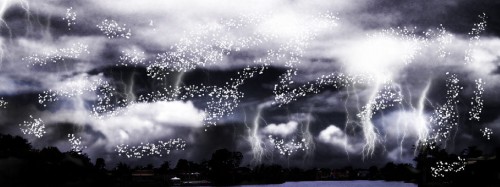
Once you set the brush, simply paint over the sky area:

Transform a Daylight Photo into a Realistic Lightning Storm Scene image 19

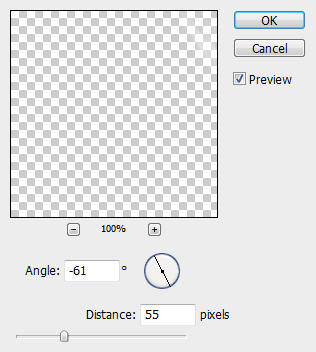
Then apply the following motion blur settings:

Transform a Daylight Photo into a Realistic Lightning Storm Scene image 20

After that, change the layer blending option to "Overlay" and you will have the following effect:
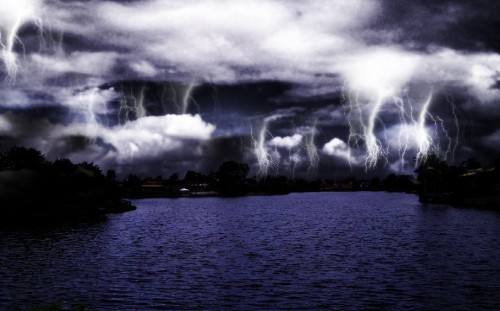
Transform a Daylight Photo into a Realistic Lightning Storm Scene image 21

Step 8

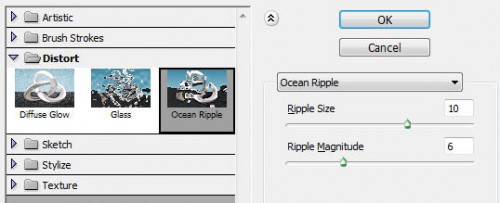
To add a bit of water splashes on the lake so it look a bit more realistic, we can duplicate the background layer once more and put the duplicated layer just above the background layer, go to Filter > Distort > Ocean Ripple and apply the following settings:

Transform a Daylight Photo into a Realistic Lightning Storm Scene image 22

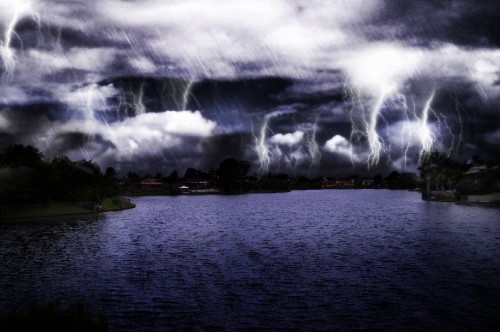
Also if you would like to reveal the houses a bit more, you can simply use the eraser tool on the "Background Copy" layer and erase the area of the house out.

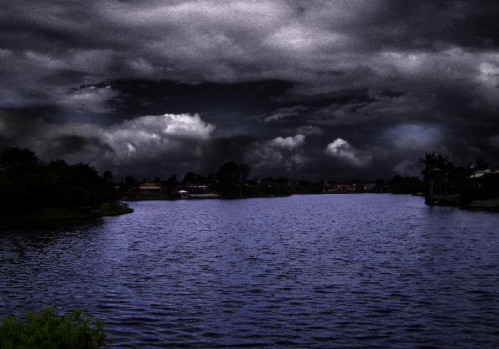
And the effect should look like the following image:

Transform a Daylight Photo into a Realistic Lightning Storm Scene image 23

Ok that's it for this tutorial! Hope you find it useful and inspirational :)

Here is my final image for this tutorial: (I adjusted the Hue/Saturation of the image a bit)

Transform a Daylight Photo into a Realistic Lightning Storm Scene Tutorial: Final Result

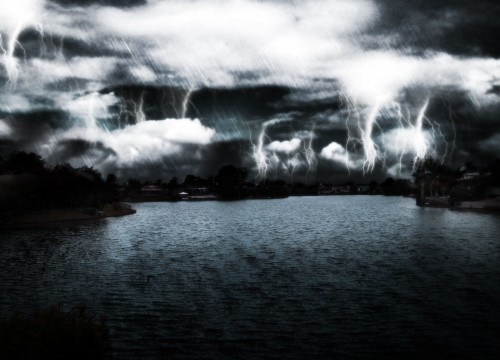
Cheers and have a nice day!

Made with Photoshop

Wednesday, August 20, 2008

 
Adobe Photoshop - Wordpress Themes is proudly powered by WordPress and themed by Mukkamu Templates Novo Blogger